Groves & Forest Map
App Version v4.0.0Forest Map
See all your groves and places on one map: find things in the forest, split it into floors (storeys), lay groves out like your home in Arranging, or move a place to another grove.
Updated on Nov 3, 2026 ~21 min read
On this page
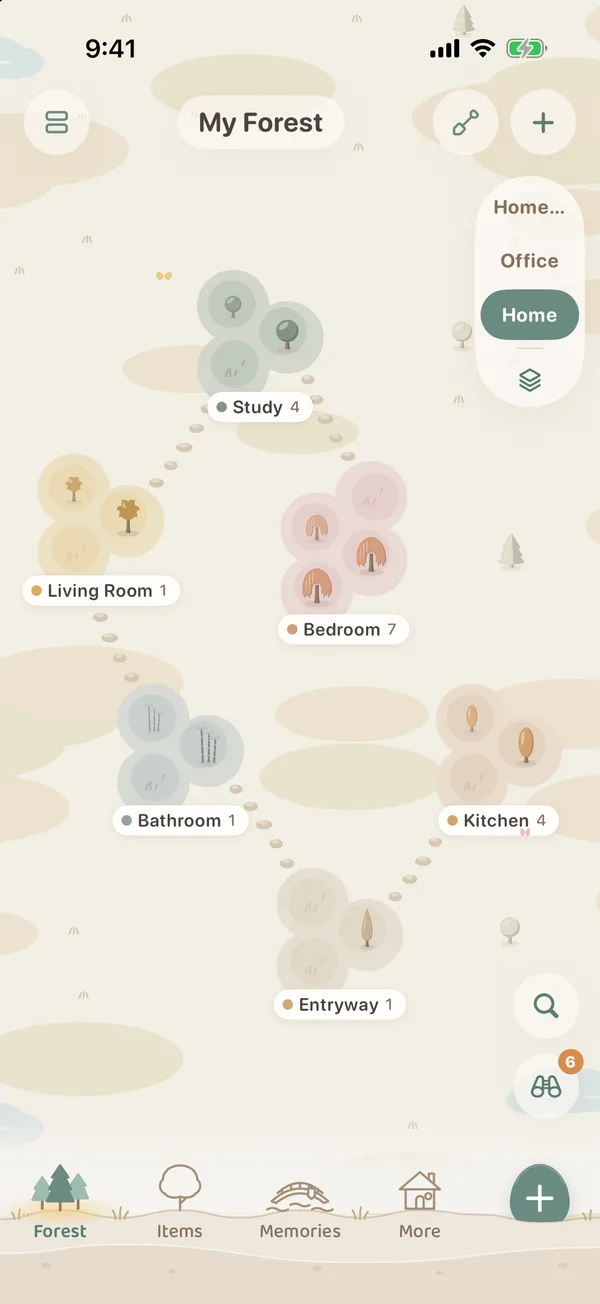
The forest map puts all your groves and places on one map: each grove has its own plot of land, and each place in a grove is a tree. When you remember which room or cabinet something is in but not what you called it, the map can take you there.
The first time you walk into the map after updating from an older version, you see “Your forest has a new map”: your groves have been laid out again automatically. To lay them out like your own home, tap the small trowel in the map’s top bar to enter Arranging. (This trowel is for Arranging. It is not the same as the trowel in Items that you use to select several items.)
Walk into the forest map
On the Forest tab, there are three ways:
- Pull the grove list down, and a row of small trees grows behind the hill. Let go once the middle one has grown into a tree;
- Tap Forest at the bottom once more;
- Tap ··· at the top right of My Forest and choose Walk into the Forest.
To go back to the list, tap Forest again, or tap the list button at the top left of the map (Show as List).
What is on the map
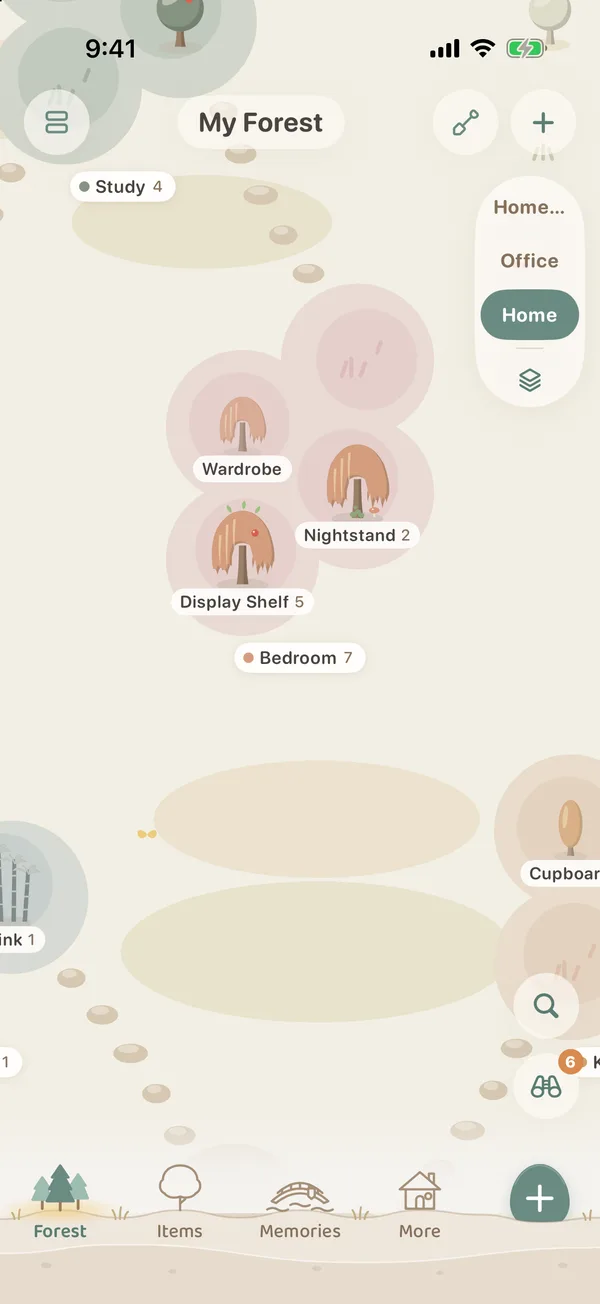
- Groves: plots of land joined by paths, each with a name sign.
- Trees: each top-level place in a grove is a tree. You can choose the kind of tree when you edit the place (see Groves, Places & Items). The more things it holds, the bigger the tree grows.
- Top bar: on the left, switch back to the list; in the middle, your forest’s name (tap it to fit the whole forest on screen); on the right, the small trowel (Arranging) and + (Create Grove, Create Shared Grove, Share an Existing Grove…).
- Storeys on the right: if you have split the map into storeys, a column on the right lists their names.
- Bottom right: the magnifying glass is Find in the Forest, and the binoculars change the view. See Lenses on the Map.
Drag the map with one finger, and pinch with two to zoom.
Tap a grove, tap a tree
Tap a grove, and its card opens below: the grove’s name, how many places, items and leaves it has, and each of its trees. On the card you can Add Item or make a New Place. The ··· menu at the top right has Edit Grove, Open Grove and Pin.
Tap a tree, and the card switches to that place: what is kept in it (Items here), plus Add Item and New Sub-place (the same as New Place Inside on the grove page). Items added from here are planted right in this place.
A shared grove’s card only has Open Grove, so you look after it from inside that grove.
Find things in the forest
- Tap the magnifying glass at the bottom right.
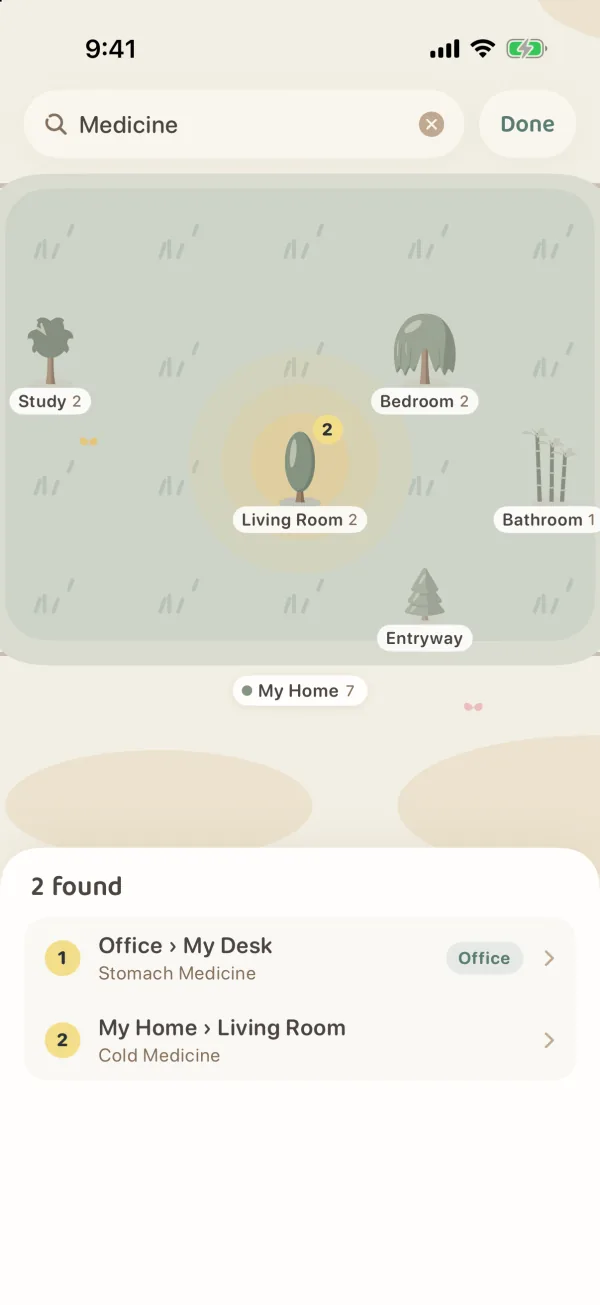
- Type a word in Find in the Forest. It searches item names, tags and place names.
- The trees holding what it finds light up, and “Found N” is listed below. Each entry shows which grove and which tree, and which items.
- Tap an entry, and the map goes to that tree. Entries on another storey show the storey’s name; tap to go there.
- When you are done, tap Done.
Storeys: a floor, or another place
A storey can be a floor of your home or another place altogether, such as “1F”, “Upstairs” or “Office”. Once you have storeys, the map shows one storey at a time, and the column on the right switches between them.
- Tap a storey’s name to go to that storey.
- Tap the stacked-layers button at the bottom of the column to open All Storeys: the storeys are stacked together, and tapping one walks you into it.
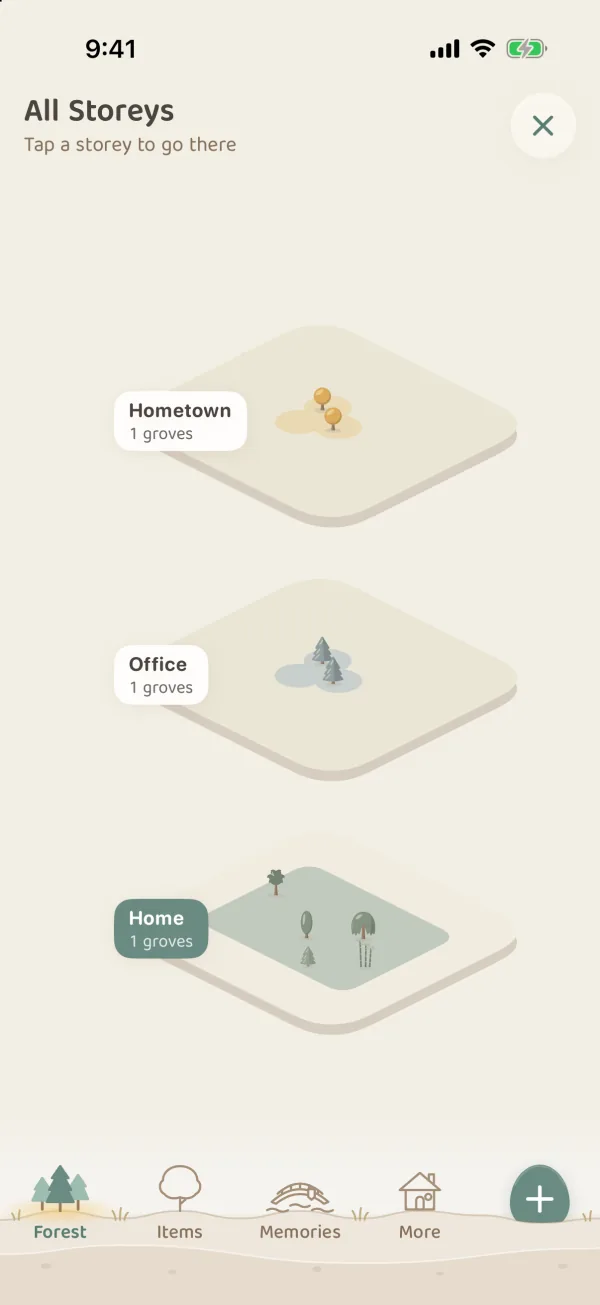
You create, rename and delete storeys in Arranging. See below.
Arranging: lay your groves out like your home
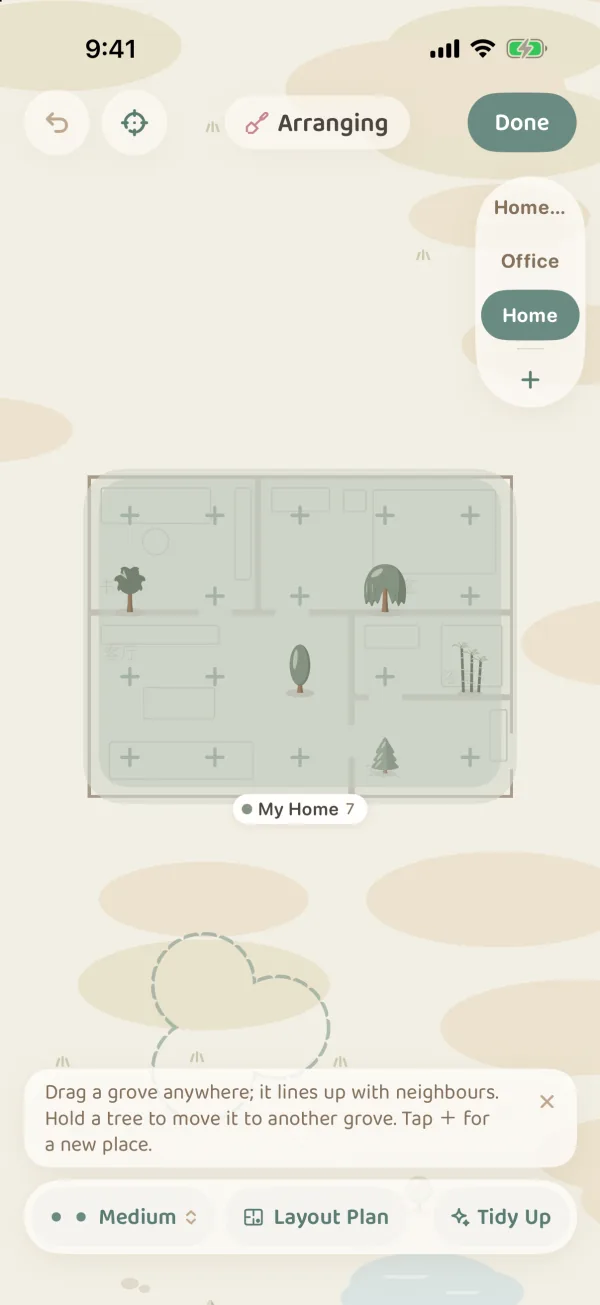
Tap the small trowel in the top bar to enter Arranging. The top changes to Undo, view the whole forest, “Arranging” and Done, with a toolbar along the bottom. The first time, a hint explains that you can drag groves anywhere and they line up when they get close to a neighbor, that you can touch and hold a tree to move it to another grove, and that + makes a new place.
Place your groves
- Press and hold a grove and drag it where you want it. It lines up when it gets close to another grove.
- Tap a grove, and a shape bar appears below: Round, Wide, Tall or Room. Use Smaller / Bigger to resize it; for a Room, drag its edges.
- The shape bar can also Move to Storey or Edit Grove.
- For a new grove, tap + New Grove; for a new place, tap the + inside a grove.
- If you put something in the wrong spot, tap Undo. When you are happy, tap Done.
Paths in the toolbar can be Narrow, Medium or Wide, setting how much room is left between groves. Tidy Up lays all your groves out again automatically.
Move a place to another grove
Touch and hold a tree and drag it into another grove, and you are asked “Move [place] to [grove]?”. Everything inside moves with it, and the message says how many places and items are inside; photos, records and rings are all kept. Tap Move It to confirm, or Put It Back.
Dragging a grove only changes where it sits on the map. But touching and holding a tree and moving it to another grove really does move that place and everything in it, and the grove in each item’s record changes too. Only do this when things have really moved in real life.
Places in a shared grove cannot be moved here. Tidy them from inside that grove.
Create and tidy storeys
In Arranging, there is a + below the storey column on the right. Tap it to make a New Storey and give it a name. Touch and hold a storey to Rename, Move Up, Move Down or Delete Storey. When you delete a storey, its groves move to another storey, and nothing in them is removed.
Layout plan: arrange it by your floor plan
To put your groves where they really are in your home, add a layout plan under them in Arranging:
- At the bottom of Arranging, tap Layout Plan.
- Choose a photo or PDF of a floor plan, a hand-drawn sketch or any map.
- Drag, pinch and rotate the plan to line it up with your forest. You can also use Turn 90°, and Lines to make the lines lighter or darker.
- Tap Done, then drag each grove to its spot on the plan.
Turn on Show on the map too to see the plan even when you are not arranging. Later you can Replace it or Remove it; when you remove it, your groves stay where they are.
The layout plan is saved only on this device. When you are signed in to iCloud, the layout of your groves syncs across your devices with your Apple Account, but the plan itself does not.
Common questions
Where did the old Gardening Mode go?
In 4.0 it became Arranging: tap the small trowel in the forest map’s top bar to enter it. The old Reset is now Tidy Up in the toolbar, and if you do not like the result, tap Undo.
Does dragging a grove on the map change where items are kept?
No. Dragging, changing shapes and switching storeys only change where things sit on the map. Only when you touch and hold a tree and move it into another grove do the place and everything in it really move. If a single item has moved, change its place in the item’s details.
Why can’t I see the layout plan on my other device?
The plan is kept only on the device you imported it on. The layout of your groves syncs, so on another device your groves are in the same spots, just without the plan underneath.
Can the forest map show things about to expire?
Yes. Use the binoculars at the bottom right and choose Leaves. See Lenses on the Map. When you pack a basket, the map can also draw an Along the Path route. See Baskets and Packing Along the Path.